Hey there, fellow Photoshop wizard (or soon-to-be wizard)! Ever been there? You’ve got this awesome image, right? Maybe it’s a super cool picture you took, or perhaps a graphic you’ve been slaving over. And then, BAM! You realize it would look way better if it was… flipped. Like, totally mirrored. Think of those symmetrical designs, or maybe you just want to swap the left and right of a portrait for a whole new vibe. Well, guess what? Photoshop makes this ridiculously easy. Seriously, it's one of those little tricks that feels like you’ve unlocked a secret level in a video game.
So, grab your digital paintbrush (or, you know, your mouse), and let’s dive into the magical world of mirroring in Photoshop. Don't worry, this isn't going to be some dry, technical manual. We're going to keep it light, breezy, and maybe even a little bit giggle-worthy. Think of me as your friendly Photoshop sidekick, here to guide you through this seemingly complex task with a smile and a few bad jokes.
The Grand Illusion: Flipping Your Image Like a Pro
Alright, first things first. You've got your image open in Photoshop. If not, get it open! Go to File > Open and select your masterpiece. Now, you might be thinking, "Where's the big, shiny 'Mirror Button'?" Spoiler alert: there isn’t one. But don't let that throw you! Photoshop is all about layers and transformations, and mirroring is just a fancy way of transforming your image. It’s like asking it to do a somersault. A really, really precise somersault.
The key here is understanding that we're not actually changing the pixels in a destructive way. We're just telling Photoshop to rearrange them for us. And the best part? You can do this to your entire image, or just a little piece of it. More on that later, because versatility is the spice of life, right?
Horizontal Flip: The Classic Mirror Image
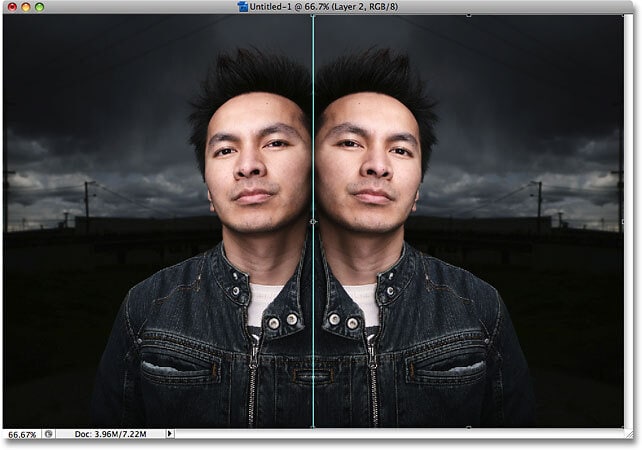
Let's start with the most common type of mirroring: the horizontal flip. This is like looking at yourself in a regular mirror. Your left hand becomes your right hand, and vice versa. It’s a simple flip across a vertical axis. So, how do we achieve this digital doppelgänger effect?
You’ll want to go to the Edit menu. See it up there? Right at the top of your screen, next to File and Image. Click on Edit. Now, scroll down. You’re looking for something that says Transform. It’s like Photoshop’s secret club for all the cool ways you can warp and bend your images. Don’t be scared; it’s a friendly club.
Underneath Transform, you’ll find a bunch of options. We're interested in Flip Horizontal. Go ahead and click that bad boy. And voilà! Your image is now flipped. Mind. Blown. It’s that simple. No magic wand required, just a few clicks and you’ve got yourself a mirrored version.
Try it out! Seriously, if you haven't done it yet, do it now. Open a picture of yourself, or maybe your pet, or even just a cool text graphic. Flip it horizontally. See how everything is now reversed? It's like your image suddenly decided to wear its clothes inside out, but in a cool, intentional way. Pretty neat, huh?

This is super handy for creating symmetrical designs. Imagine you’ve designed half of a logo or a pattern. Instead of recreating the other half from scratch, just flip the first half and put them together. Boom! Instant symmetry. Saves you time, saves you effort, and frankly, makes you look like a Photoshop genius. "Oh, this symmetrical design? Piece of cake. Just a little bit of flipping." You can almost hear the awe from your imaginary audience.
Vertical Flip: The Upside-Down World
Now, what if you want to flip your image upside down? Think of looking at a reflection in a perfectly still lake. That’s a vertical flip. It’s a flip across a horizontal axis. It’s a bit less common than a horizontal flip, but just as useful in certain scenarios. Maybe you have a photo that’s just begging to be inverted, or you’re creating a surreal landscape.
The process is almost identical to the horizontal flip, because, well, it's in the same secret club! Head back to Edit, then Transform. This time, you’re going to select Flip Vertical. Click it, and watch your image do a graceful (or maybe slightly awkward, depending on the image) somersault in the opposite direction.
And just like that, your image is now upside down. It’s like a portal to an alternate reality where gravity works differently. This can be great for creating interesting visual effects, especially with landscapes, water, or abstract art. Sometimes, a simple inversion can completely change the mood and impact of a photograph. Don’t knock it till you try it!
Think about it: a stunning sunset photo could be mirrored vertically to create an ethereal, dreamlike effect. Or maybe you've got a building that looks cool from above, but even cooler when its reflection appears to be stretching upwards. The possibilities are as endless as your imagination. And Photoshop just gave you another tool to play with.
Mirroring Just a Part of Your Image: Precision Power!
Okay, so we’ve covered flipping the whole enchilada. But what if you only want to mirror a section of your image? This is where things get really fun, because it opens up a whole new world of creative possibilities. You’re not just flipping the whole canvas; you’re being a surgical artist with your pixels!
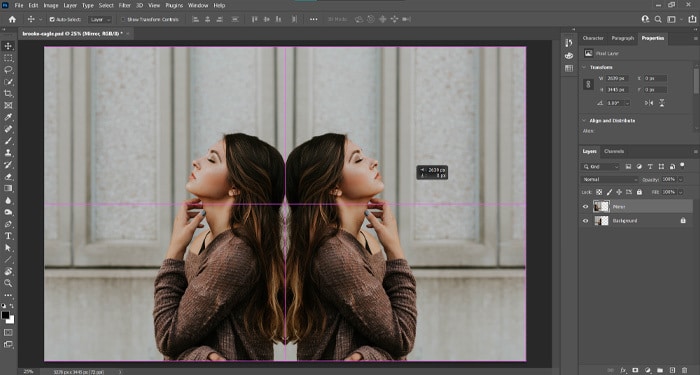
First, you need to select the part you want to flip. You can use any of Photoshop's selection tools for this. The Marquee Tools (the rectangular and elliptical ones) are great for basic shapes. The Lasso Tools (freehand, polygonal, and magnetic) are for more complex outlines. And if you’re feeling fancy, the Quick Selection Tool or the Magic Wand Tool can work wonders on distinct areas. Don't be afraid to experiment with these!
Once you have your area selected, the magic happens. Instead of going to the main Edit > Transform menu (which would flip the entire layer if you haven't duplicated it), we need to be a little more specific. This is where we might consider copying and pasting, or working with layers.
The Copy-Paste Flip Method
This is probably the most straightforward way to flip a selection. Once you’ve got your area selected, hit Ctrl+C (or Cmd+C on a Mac) to copy it. Then, hit Ctrl+V (or Cmd+V) to paste it. What you’ve just done is created a new layer containing only your selected area. Pretty slick, right?
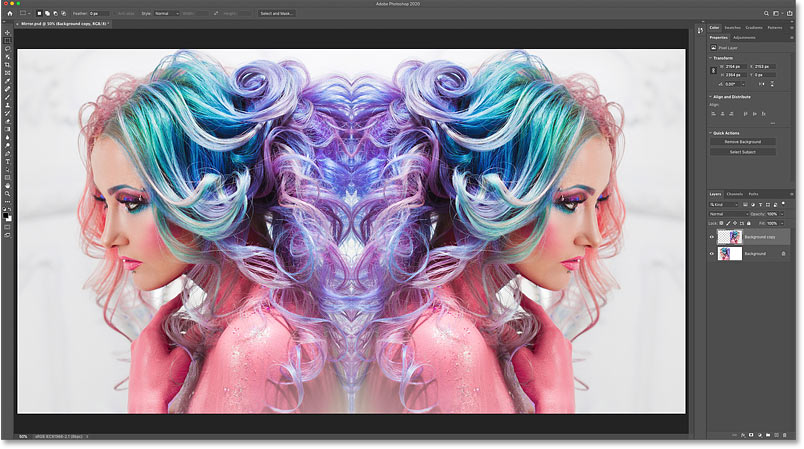
Now that your selection is on its own layer, you can freely transform it without affecting anything else on your canvas. With this new layer active, go to Edit > Transform and choose either Flip Horizontal or Flip Vertical, just like we did before. Poof! Your selected piece is now mirrored.
You can then move this mirrored piece around, position it exactly where you want it, and blend it back into your original image. This is fantastic for creating repeating patterns, mirroring details on a character, or even creating abstract compositions where you duplicate and flip elements. It's like having a Photoshop clone army, but for your specific image elements.

The Layer Via Copy/Cut Method
This is a slightly more efficient version of the copy-paste method. Instead of copy and then paste, you can tell Photoshop to cut or copy the selection directly to a new layer. It's a small time-saver, but hey, every second counts when you're in the creative zone!
So, with your selection active, go to Layer > New > Layer Via Copy. This will create a new layer with your selected area copied onto it. Or, if you want to remove the original selection from its layer, choose Layer > New > Layer Via Cut. This is useful if you want to replace the original with its mirrored version.
Once you have your selection on its own new layer, the flipping process is the same as before: Edit > Transform > Flip Horizontal or Flip Vertical. The beauty of this is that your original image remains untouched, giving you maximum flexibility. You can always go back, grab the original piece again, and try a different mirroring technique.
Beyond the Flip: Creative Applications and Tips
We’ve covered the how, but let’s talk about the why. Why would you want to mirror an image? Well, we've touched on a few, but let’s expand on them. The world of Photoshop is your oyster, and mirroring is just one of its many delicious pearls.
Creating Symmetry: The Artist's Best Friend
Symmetry is pleasing to the eye. It creates balance and harmony. Whether you're designing a logo, a poster, or just want to make a portrait look more dramatic, mirroring is your secret weapon. Imagine a butterfly! Naturally symmetrical, right? You can draw half a wing, then mirror it to get the whole thing perfectly balanced.
This also works for text effects. Want to create a cool, symmetrical word art graphic? Type your word, duplicate the layer, flip one horizontally, and then position them next to each other. You can then add effects to both layers, or even merge them for a unified look. It’s like having a built-in symmetry generator!

Surrealism and Abstraction: Playing with Perception
Sometimes, the most interesting art comes from breaking the rules of reality. Mirroring an image can create surreal and dreamlike landscapes. Flipping a building upside down can make it look like it’s floating in water or defying gravity. Mirroring parts of a person's face can create unsettling yet fascinating portraits.
Think about combining elements too. You could take a photo of a tree, mirror it, and then blend it with the original to create a fantastical, ghostly tree. Or take a photo of a cloud formation, mirror it, and create an alien sky.
Mirroring for Detail Enhancement
Sometimes, a detail just needs to be on the other side. Maybe you have a product shot where a label is facing the wrong way, or a character design where a button or a pocket needs to be on the opposite side for visual balance. Instead of re-drawing it, just mirror the existing detail.
Remember to work with selections and new layers for this. You don’t want to accidentally mirror your entire product shot just to flip a button. Precision is key!
A Few Extra Tips to Keep You Smiling:
- Use the Transform Tool for More Control: After you’ve flipped an image or selection, you can still use the Free Transform tool (Ctrl+T or Cmd+T) to resize, rotate, or even skew it further. This gives you ultimate control over your mirrored element.
- Check Your Layers: Always be aware of which layer you’re working on. This is the golden rule of Photoshop. If you’re trying to mirror something and it’s not working, double-check your active layer!
- Experiment with Blending Modes: Once you’ve mirrored an element and placed it back on your canvas, try playing with the blending modes on its layer. This can create some really interesting and unexpected effects, especially if you’ve mirrored a photo and are layering it over itself.
- Don't Be Afraid to Undo: Made a mistake? Hit Ctrl+Z (or Cmd+Z) to undo. Photoshop has a beautiful, forgiving nature. So go ahead, experiment boldly!
- Practice Makes Perfect (and Fun!): The more you practice mirroring, the more natural it will become. You'll start seeing opportunities to use it everywhere. It's like learning a new language, but instead of words, you're speaking the language of pixels!
So there you have it! Mirroring in Photoshop is not some mystical art reserved for the elite. It’s a simple, accessible tool that can add a whole new dimension to your creations. Whether you’re aiming for perfect symmetry, a touch of surrealism, or just need to flip something for practicality, you now have the knowledge to do it with confidence (and maybe a little bit of flair).
The next time you’re working on a project and you think, "Hmm, this would be cooler mirrored," don’t hesitate! Dive in, flip it, and see what magic you can create. Remember, the most important part of using any creative tool is to have fun. So go forth, mirror to your heart’s content, and let your imagination run wild. You've got this, and the results are sure to make you smile!